


What is NocoDB?
NocoDB enables you to interact with your relational databases online (and locally) - acting essentially like a spreadsheet. Once set up and deployed, you can easily grant access to other people and control their permissions.
Why did I want to use it?
With one of my clients I would often get a similar vein of question - along the lines of ‘can you tell me who is currently signed up to our website?’. Essentially, my client wanted to view my ‘users’ table. After a while I started to feel a bit used 😿 so I wanted to find a solution wherein my client can view the data they need by themselves.
How to run NocoDB locally
N.B. I would personally skip this step (and jump to the ‘How to deploy NocoDB on Heroku’ section) if you already have your chosen database hosted in the cloud and wish to share it with other people.
There are multiple ways of running NocoDB locally - using docker, npx or cloning via git. I seemed to have limited success with the first two methods (probably just me…) so I would recommend cloning via git. Once cloned and running, navigate to http://localhost:8080/dashboard to sign up and view your dashboard.
Connecting to an external database
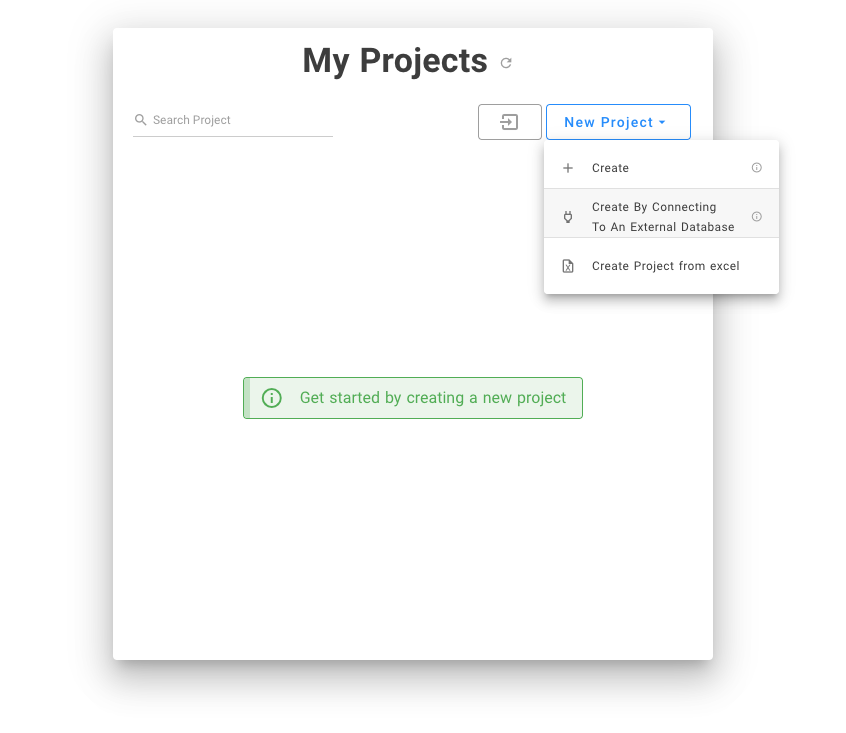
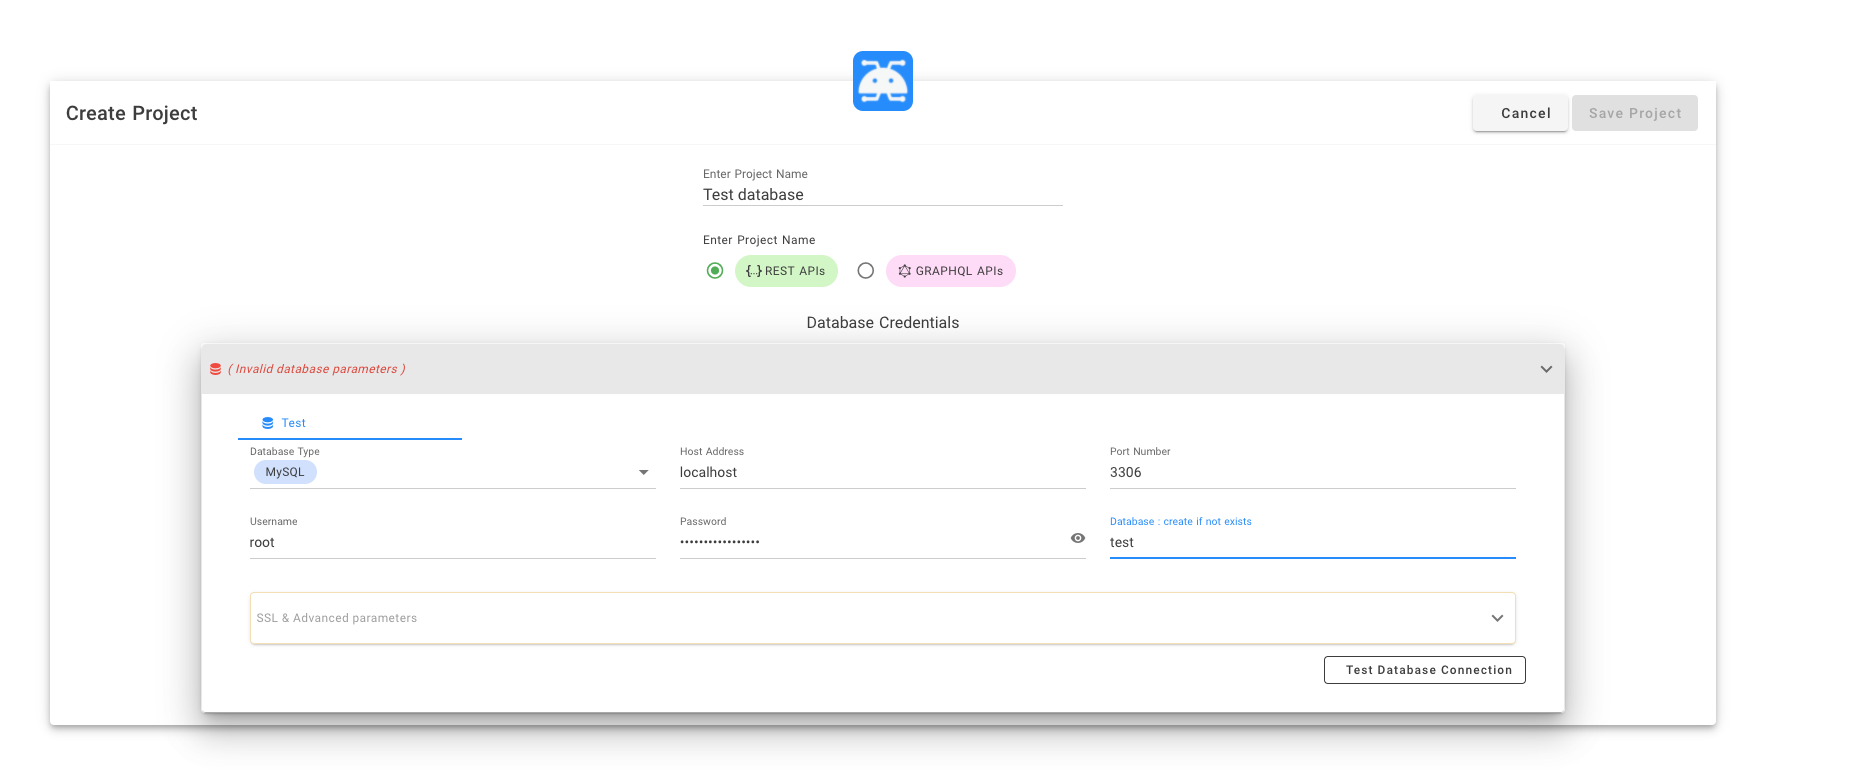
To get started with connecting your database to NocoDB, click ‘new project’ then ‘create by connecting to an external database’ on your dashboard page. You will then be prompted to fill out your credentials to connect to your database. If connecting to a local db, ensure your SQL server is running and specify ‘localhost’ as the host address. If connecting to a remote database, use its public IP address as the host address. You can also specify a project name on this page - or you will be automatically generated one.
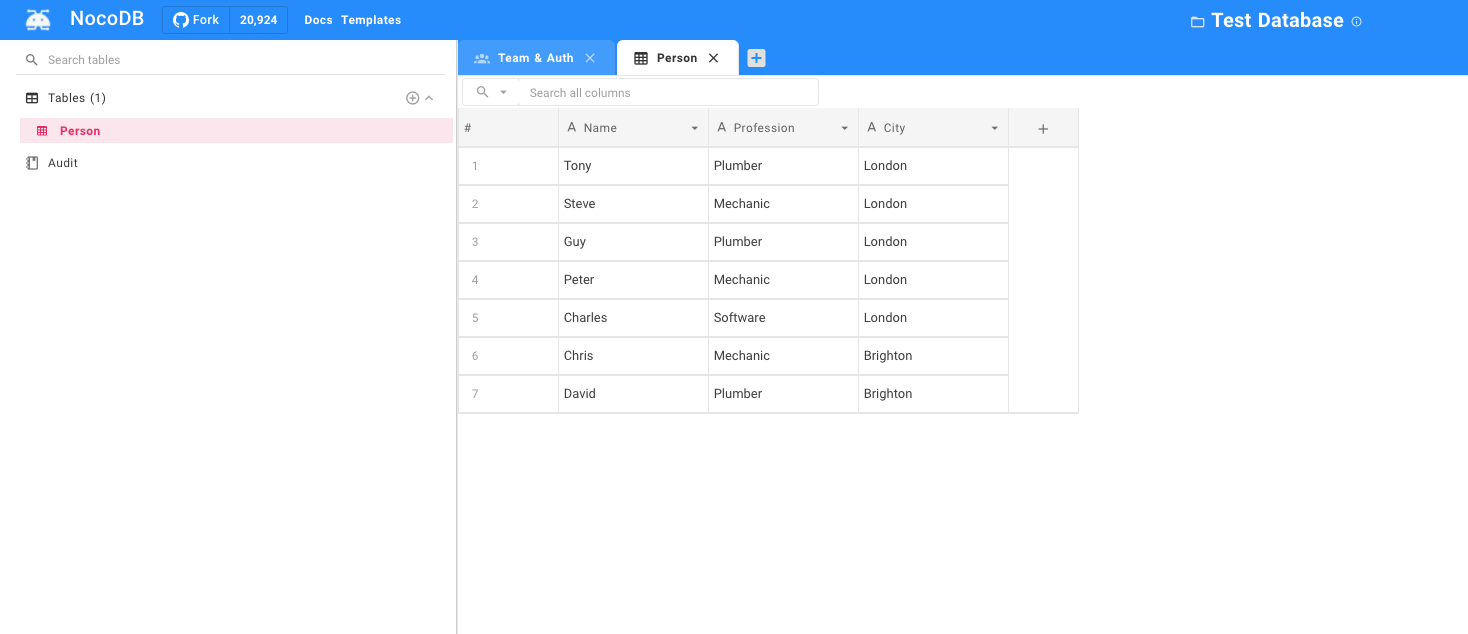
Once saved, you will be able to view your tables in the left hand navigation bar and interact with your data by clicking into a table.
How to deploy NocoDB on Heroku
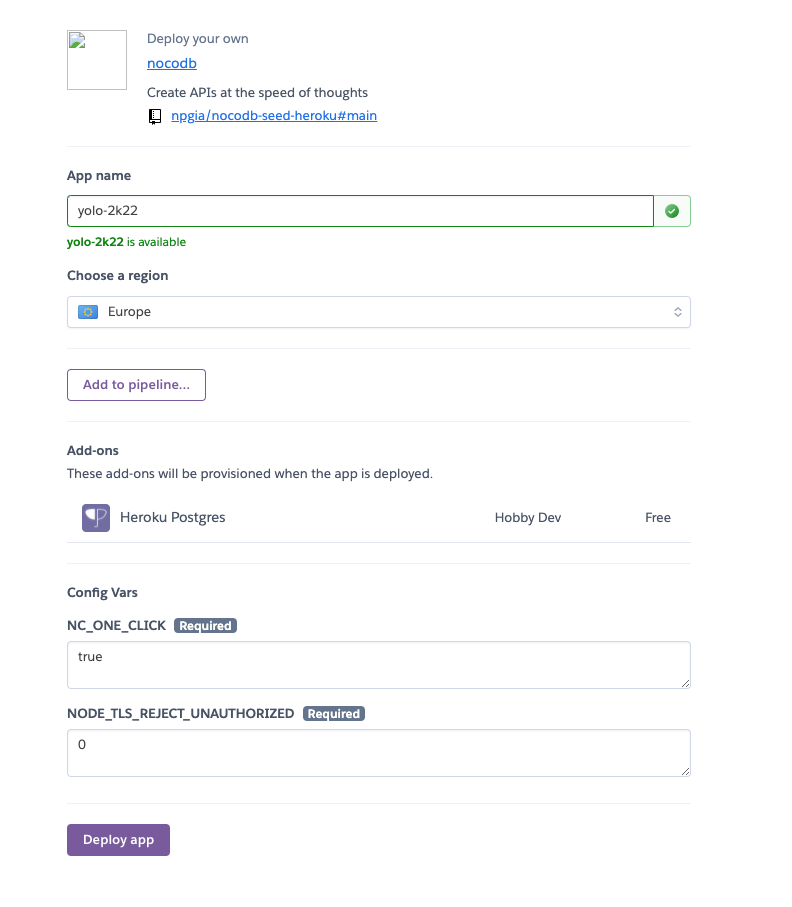
Deploying an instance of NocoDB is incredibly straightforward with Heroku. Just customise the variables as you see fit and hit ‘deploy’.
Then navigate to your app by visiting https://APP-NAME.herokuapp.com/dashboard
Once deployed, if you wish to share your database with other people, navigate to the ‘Team & Auth’ tab to add emails and roles.
In need of a back-end engineer for your project? Get in touch to hire me for contract work 💯